by Melanie

Green Eggs and Ham for Dr. Seuss Day!

February 26, 2014 in Great Room, Kitchen by Melanie

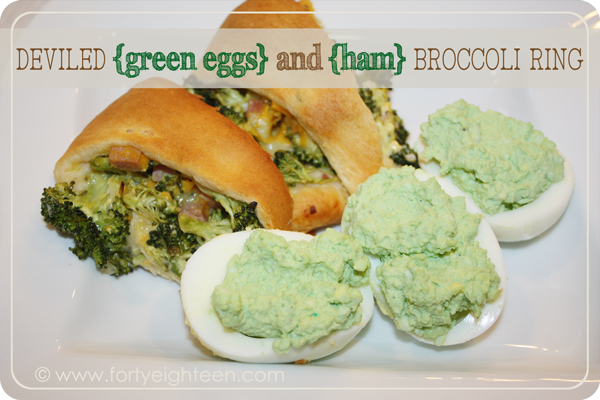
A fun twist on Green Eggs and Ham to celebrate Dr. Seuss day with Deviled {Green Eggs} and {Ham} Broccoli Ring! from FortyEighteen.com #drseuss

I am Sam. Sam I am.

I think Green Eggs and Ham is my favorite Dr. Seuss book because it’s the first one Beth could read on her own. A cute little girl reading a cute little story is just about the cutest thing ever! So naturally we’re celebrating Dr. Seuss Day on March 2nd with Green Eggs and Ham.

My older brother made {green} scrambled eggs for my girls once when we were all visiting grandma’s house. I don’t even remember why he did that, but I do remember how much they LOVED it. For the next few years, every time we visited, they would ask for green eggs. It became one of those special grandma’s house treats.

Getting ready for Dr. Seuss Day, I’m thinking about Green Eggs and Ham, but I need a new twist on green eggs to make it extra special. My kiddos are totally in love with deviled eggs, so I’m sure this is the perfect twist I am looking for! And of course, we can’t just have a boring old piece of ham. So we’ll add to the fun with a delicious Ham Broccoli Ring that everyone LOVES.

A fun twist on Green Eggs and Ham to celebrate Dr. Seuss day with Deviled {Green Eggs} and {Ham} Broccoli Ring! from FortyEighteen.com #drseuss

My deviled eggs are simple and delicious and made to taste. Which means I don’t really have a recipe to share… since I never measure what I put in, but here is my basic process.

Start by making hard-boiled eggs. Add a single layer of eggs to your pot and cover with cold water. Heat to a boil over high heat. When you’ve got a hard boil going, turn off the heat, cover with a lid, and let it sit for 20 minutes. At the end of 20 minutes, pour off the hot water and cover with cold water to stop the cooking.

When you’re ready to work with the eggs, remove the shells and slice the eggs in half. Remove the yolks. Place the whites on a platter and the yolks in a bowl. I usually end up with a few eggs that didn’t peel very well, and I add those to the bowl, too, whites and all. Mash the egg yolks (and those few mutilated whole eggs) with a fork and then start making them tasty.

I add onion powder, garlic powder, pepper, Miracle Whip and mayonnaise (yes, both), mustard, and dill pickle juice. I may add salt if they need it, but they usually don’t need any more than what is already in the pickle juice. To make them green add blue, yellow, and green food coloring — a lot of blue, a bit of yellow, and some green.

Scoop the filling into the egg whites. I think the easiest way to do that is with a baby spoon. The baby spoon is great for taking the yolks out of the eggs whites in the beginning, too. Or you could use a pastry bag or ziploc bag with a large star tip and pipe the filling into the whites to make it look extra fancy. Sprinkle the tops with paprika – which I didn’t do here because they’re green, but I always add paprika to my non-green deviled eggs – and they’re ready to enjoy.

A fun twist on Green Eggs and Ham to celebrate Dr. Seuss day with Deviled {Green Eggs} and {Ham} Broccoli Ring! from FortyEighteen.com #drseuss

Broccoli Ham Ring

  • 2 tubes refrigerated crescent roll dough
  • 1-1/2 c shredded Swiss cheese (or any kind of cheese you want! – I did a mixture of Swiss and cheddar in this batch)
  • 1 c diced ham
  • 2-1/2 c fresh broccoli, chopped
  • 1 small onion, chopped (or 2-3 green onions – my fave)
  • 1 tomato, diced (optional)
  • 1/4 c minced fresh parsley (or about 2 tsp dried parsley)
  • 1 Tb mustard
  • 2 Tb Ranch dressing
  • 1 tsp lemon juice

Unroll crescent dough and place triangles around a round baking pan (like a pizza pan) with the edges overlapping. Lightly press the ends together to seal them.

Combine everything else in a big’ol bowl, then spoon it over the ring you made with the wide ends of the rolls. Fold the thin points over the filling and tuck under the wide ends. This won’t cover the filling completely. Bake at 375 for 20-25 minutes or until golden brown.

A fun twist on Green Eggs and Ham to celebrate Dr. Seuss day with Deviled {Green Eggs} and {Ham} Broccoli Ring! from FortyEighteen.com #drseuss

This may be my new favorite way to eat Green Eggs and Ham! And I will eat them in the rain and in the dark and on a train and in a car and in a tree. They are so good, so good you see!

You will like it, you will see. You will like it just like me!

How are you celebrating Dr. Seuss Day???

by Melanie

Cherries + Cheesecake = Cloud Nine

February 20, 2014 in Great Room, Kitchen by Melanie

Happy Cherry Pie Day! I may have mentioned before that I am not a huge fan of fruit pies. Honestly, cherry pie really isn’t my thing, but I couldn’t let this day go by without celebrating somehow.

I think adding the word “cheesecake” is the best thing that can happen to a pie.

I’m also a huge fan of desserts I can cut into bars. I mean, let’s be real. Bars are so much easier to eat. And so much easier to justify *just one more.*

One more bar? Sure! It’s not like I’m eating a whole piece of pie!

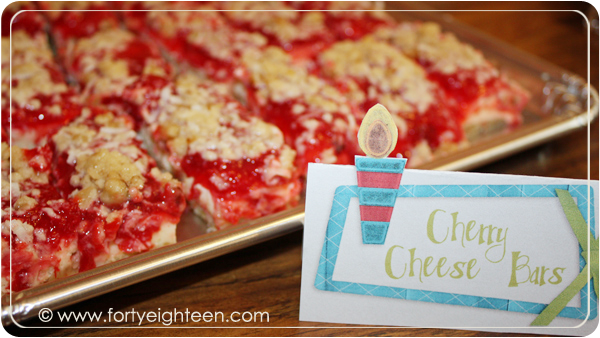
So let’s celebrate Cherry Pie Day with some fabulous Cherry Cheesecake Bars. All in favor?

I brought these to the kids’ school for the teachers’ monthly birthday treat from the PTA. I brought four different kinds of bars (and they were all delish!). When I went back later to clean up, there wasn’t even a crumb of these left on the plate. They’re so yummy.

cherry cheese bars


Cherry Cheese Bars

Crust:

  • 1 c walnut pieces, divided
  • 1-1/4 c flour
  • 1/2 c brown sugar
  • 1/2 c butter
  • 1/2 c coconut

Filling:

  • 2 pkg (8 oz each) cream cheese, softened
  • 2/3 c sugar
  • 2 eggs
  • 2 tsp vanilla
  • 1 can (21 oz) cherry pie filling

Start with your prep work. Preheat the oven to 350. Grease a 9×13-inch baking dish. Coarsely chop 1/2 c nuts and set them aside. You will use these later for the topping. Then chop the rest of the nuts.

For the crust, combine the flour and brown sugar. Cut in the butter until you have fine crumbs. Add 1/2 finely chopped nuts and mix well.

Take 1/2 cup of that mixture and add it to the nuts you set aside earlier. Press the rest into the the bottom of your baking dish. Bake at 350 for 12-15 minutes or until edges are lightly browned. Do not over bake.

For the filling, combine cream cheese, sugar, eggs, and vanilla. Beat at medium speed until well blended. Spread over hot baked crust and return to the oven. Bake 15 minutes. Do not over bake.

Spread the cherry pie filling over the cheese layer. Of course for Cherry Pie Day we’ll use cherry, but you can substitute any flavor pie filling that sounds good to you. Next time I’m making strawberry. mmmmm I didn’t want big chunks of cherries, so I used my immersion blender to puree the pie filling a bit first.

Return it to the oven and bake another 15 minutes. (Do not over bake. Are you sensing a theme here? Don’t over bake.)

One more layer to go! If you haven’t mixed the nuts and crust mixture that you aside, do it now. Then sprinkle it over the pie filling. Return it to the oven one more time and bake another 15 minutes. And what’s our theme? Do not over bake.

Cool in the pan on a cooling rack, then refrigerate for several hours. When you’re ready to enjoy this delectable dessert, cut it into bars and try not to inhale it. If you do have any bars left over, store them in the fridge.

Savor every single scrumptious bite. Happy Cherry Pie Day!

by Melanie

Homemade Wheat Bread

February 4, 2014 in Kitchen by Melanie

I used to laugh when my dad would smell something and tell us about the memory it triggered. Whose memory is in their nose??? My dad’s.

And apparently mine is, too.

I vividly remember walking home from school and walking in the door to the most heavenly smell. I was lucky to have a mom who was home when I got home from school, and on the best days, I got to come home to warm bread fresh from the oven.

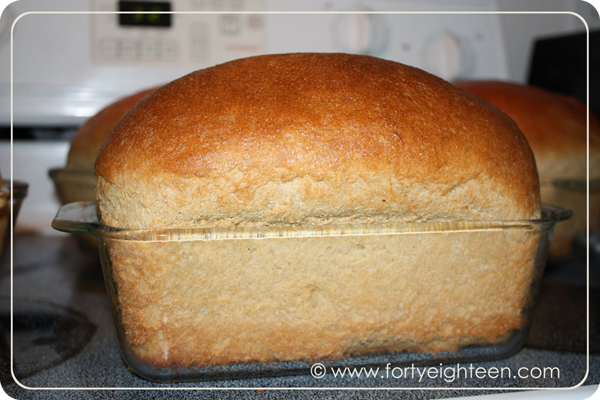
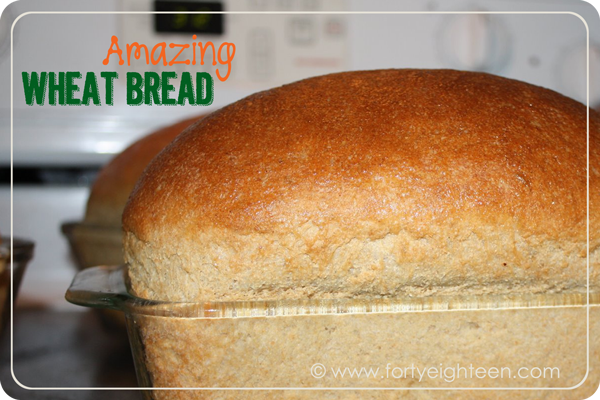
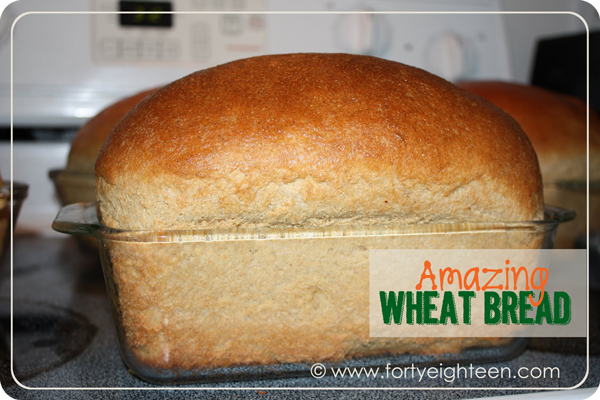
Amazing Supermom Wheat Bread | Forty Eighteen #wheat #bread

Yum.

Nothing says home quite like the smell of homemade bread.

The thing about homemade whole wheat bread is that it’s often really dense and heavy. And it seems to dry out really fast. If that is how you feel about wheat bread, you are going to LOVE this.

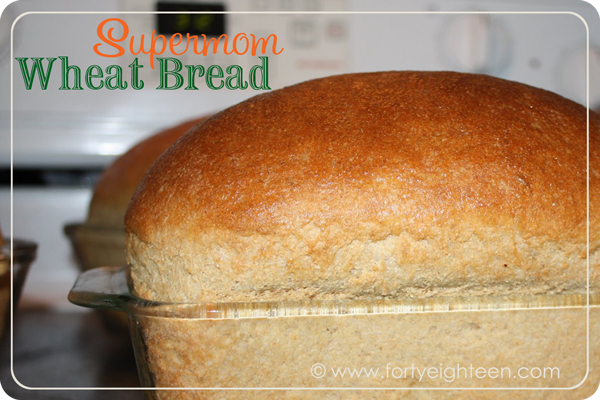
Amazing Supermom Wheat Bread | Forty Eighteen #wheat #bread

This bread is the absolute best. It’s light and fluffy and so, so tasty! Add some homemade jam, and it’s good enough to be dessert.

Trust me.

Do you know what else I love about homemade bread? It totally makes me feel like Supermom every time I make it.

Feel like supermom when you make this amazing bread! | Forty Eighteen

It’s not like bread is hard to make, but still… it’s pretty super.

Try it. You’ll see what I mean.

Amazing Supermom Wheat Bread | Forty Eighteen #wheat #bread


Supermom Wheat Bread

  • 5 c hot water (115-120 degrees F)
  • 2 Tb SAF yeast (3 Tb if you use another kind of yeast)
  • 1/2 c honey
  • 1 Tb liquid lecithin
  • 1/3 c oil
  • 2 Tb salt
  • 1 tsp vitamin C powder
  • 12 c whole wheat flour (or a bit more as needed)

In your bread mixer, mix together everything except the flour. You don’t need to proof the yeast. Just toss it in there. Measure out the oil first, then pour that into the 1/2 c before pouring it into the mixer. That way your honey won’t stick to the cup. The lecithin is super sticky, so you’ll probably have to measure it the first time, but then just eyeball it after that. I have to get the lecithin and vitamin C powder at a health food store. The vitamin C powder really makes it fluffy, so don’t leave that out.

Then add the flour and mix 10 minutes on medium speed. Don’t add more flour after the first 2 minutes (it has something to do with how the gluten breaks down). The mixer kneads it for you so you don’t have to!

Now it’s time to raise the roof! I mean, the dough.

One of the things that makes this bread so light and fluffy is the double rise. First, let the dough rise until doubled. I put it in one of those big red plastic bowls you can get at Walmart for about $2 and let it raise until it just starts peeking over the top of the bowl.

Then smash it down (this is a great stress reliever) and divide it into 4-5 equal parts. Shape into loaves and let rise In the well-greased loaf pans until it’s an inch or two above the edge.

Bake at 350 for 40 minutes. When you pull it out, brush the tops with butter, if desired. This is purely for that pretty shine. You can let it sit for a few minutes before taking it out of the loaf pans, but don’t let it sit too long or it will sweat and get soggy.

Then sit back, have a slice, and enjoy feeling like Supermom.

supermombread


by Melanie

Chocolate!

January 29, 2014 in Great Room, Kitchen by Melanie

I’ve had to make a few desserts lately, so I went searching for a fabulous pie for a pie social and a chocolate cake for National Chocolate Cake Day (January 27). We could call this Pinspiration: The Chocolate Dessert Edition.

pinspiration-red

We couldn’t let National Chocolate Cake Day pass without an appropriate celebration, so I went searching for a chocolate cake recipe fit for a party. We have a favorite chocolate sheet cake recipe that is fast and easy and loved by everyone (even Beth, who doesn’t like cake), but I wanted something different. I found this chocolate layer cake at Taste of Home and fell in love. My family ALWAYS requests the sheet cake for every event that requires cake, so I never get to do fancy cakes with big layers and lots of frosting anymore. This was a definite MUST pin and MUST try.

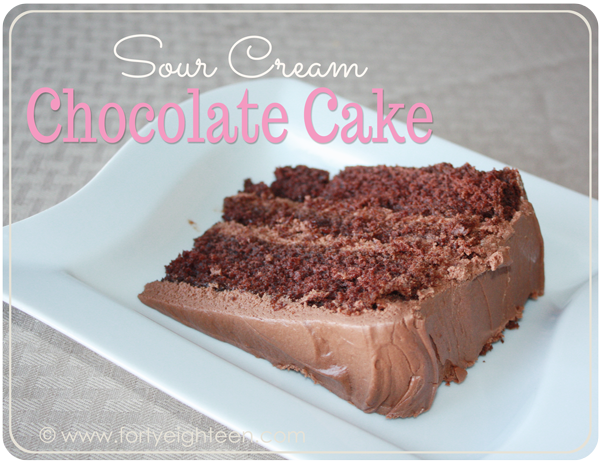
Chocolate desserts including this Sour Cream Chocolate Cake at Forty Eighteen


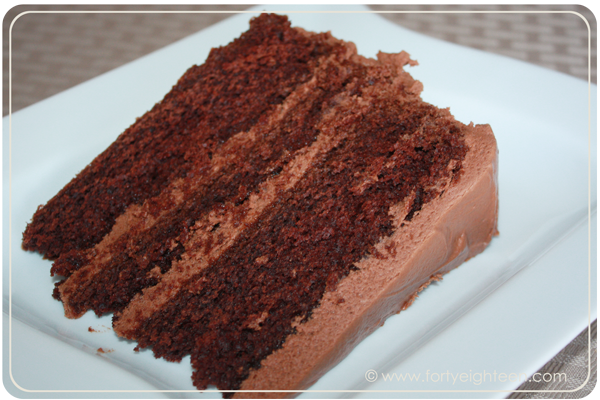
The cake was fabulous. Moist and delicious, dense enough to stack well, but not heavy or dry. One of the cakes stuck to the cooling rack and ripped apart when I tried to pick it up a little less carefully than I should. You can see that my middle layer is WAY smaller than the other two. hahaha The vultures descended and inhaled the unusable part until the counter was cleaner than when I started cooking. That little taste made us even more excited for dessert time.

I should probably make a little note here about my love of frosting. I LOVE frosting. I kept a can of frosting in my dorm room fridge just to sneak a spoonful when I needed a sugar high to make it through a late-night cram session. Oh, who am I kidding. I ate it with my bare hands whenever I wanted just because I could.

This chocolate frosting somehow managed to be unbelievably sour and sickeningly sweet at the same time. I made the colossal mistake of assuming it would work with the cake and proceeded to completely ruin this fabulous cake with this horrible frosting. So sad.

So I would definitely recommend the cake and I plan to make it again, but I will be searching for a much better chocolate frosting recipe that will complement this delicious cake. Click on an image to take you to the pin.

Chocolate desserts including this Sour Cream Chocolate Cake at Forty Eighteen

Sour Cream Chocolate Cake

  • 1 c baking cocoa
  • 1 c boiling water
  • 1 c butter, softened
  • 2-1/2 c sugar
  • 4 eggs
  • 2 tsp vanilla extract
  • 3 cups cake flour
  • 2 tsp baking soda
  • 1/2 tsp baking powder
  • 1/2 tsp salt
  • 1 c ( 8 oz) sour cream

Dissolve the cocoa powder in the boiling water and set aside to cool. Cream the butter and sugar until light and fluffy, then add eggs, one at a time, beating well after each one. Add the vanilla. Combine the flour, baking soda, baking powder, and salt and gradually add to the creamed mixture, alternating with the sour cream. Beat well with each addition. Finally, add the cocoa mixture and mix well.

Pour batter into 3 greased and floured 9-inch round cake pans. Bake at 350 for 30-35 minutes (don’t overcook or it will dry out) or until a toothpick inserted in center comes out clean. Cool for 10 minutes in pans before removing to cooling racks. Cool completely before frosting.

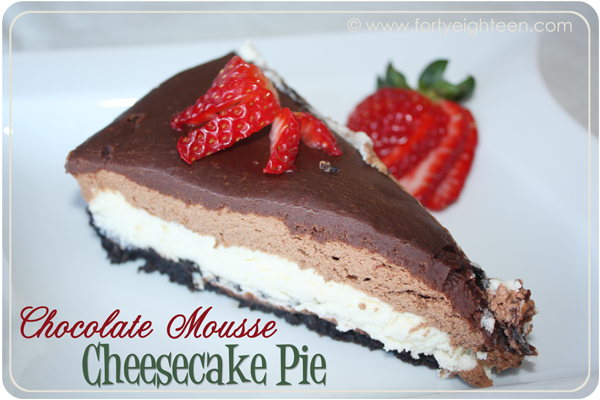
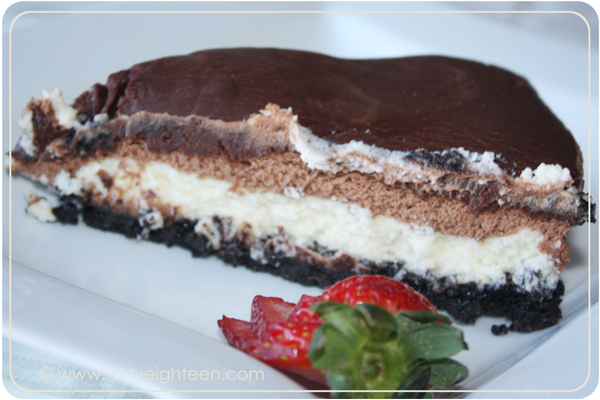
For the pie social, I knew everyone would be bringing a pie so there would be lots of flavors to try. I decided early on that I wanted to make something chocolatey and then headed to Pinterest to investigate. This Chocolate Mousse Cheesecake Pie from Mel’s Kitchen Cafe was the winner… and I chose wisely.

Chocolate desserts including this Chocolate Mousse Cheesecake Pie at Forty Eighteen


Full disclosure: This pie is not a quick fix. It takes a lot of time to put it together, but it is totally worth the effort. You start with an Oreo crust and add creamy cheesecake. Spread on a layer of fluffy chocolate mousse and top with rich, decadent ganache.

oh. my. yumminess.

Seriously. This pie is a. ma. zing.

It’s incredibly rich, so you only need a small piece. Make it even more amazing by slicing up a strawberry and having a bit of strawberry with each bite.

Pure heaven.

Honestly, I’m not a huge Oreo fan, so I would make a different crust next time. Maybe Pecan Sandies or something with nuts, butter, and flour. Either way, I WILL DEFINITELY be making this again.

Chocolate Mousse Cheesecake Pie

Crust:

  • 24 Oreos, crushed
  • 5 Tb melted butter

Cheesecake:

  • 8 oz cream cheese, softened
  • 1/2 c sugar
  • 1 large egg
  • 1 egg yolk
  • 1 tsp vanilla
  • 1 c sour cream

Mousse:

  • 1 c heavy cream, divided
  • 2 egg yolks
  • 1/2 c semisweet chocolate chips
  • 1/4 c powdered sugar (optional for sweetness)

Ganache:

  • 1/2 c semisweet chocolate chips
  • 4 Tb butter
  • 1/4 c heavy cream
  • 1/2 tsp vanilla
  • 1 Tb powdered sugar

Preheat the oven to 325. To make the crust, combine the crushed cookies and melted butter. Press on the bottom and up the sides of a deep 9-inch pie plate or a springform pan. Refrigerate while you make the cheesecake filling.

Cream the cream cheese and sugar until smooth. Add the egg, yolk, and vanilla and mix until combined. Blend in the sour cream. Spread the filling over the cookie crust and bake for 40-45 minutes, until the edges are set and the center is slightly firm. Mel says a little softness is okay, but you don’t want it to be really jiggly. Let it cool completely before adding the mousse.

To make the mousse, bring 1/2 c cream to a simmer in a small saucepan. With your egg yolks in a small bowl, pour a couple tablespoons of the hot cream into the egg yolks and whisk vigorously until completely combined. Return the egg mixture to the saucepan with the cream. Keep whisking quickly and stir constantly until it bubbles and thickens, about 1-2 minutes. Remove from the heat and stir into the chocolate chips, whisking until the mixture is smooth and the chocolate is completely melted. Now is the time to add the powdered sugar if you would like a little more sweetness: whisk in up to 1/4 cup. Let the mixture cool to room temperature, mixing occasionally to avoid a skin forming across the top. Beat the rest of the cream (1/2 c) to stiff peaks, and gently fold into the chocolate mixture when it has completely cooled. Spread it over the top of the cheesecake layer and chill.

While it chills, make the ganache by heating the cream and butter over medium heat in a saucepan until simmering. Place the chocolate chips in a small bowl and pour the hot cream mixture over. Stir until the chocolate is melted, glossy and smooth. Stir in the vanilla and powdered sugar. Spread over the mousse and refrigerate until ready to serve (at least an hour up to a day in advance).

 Chocolate desserts including this Chocolate Mousse Cheesecake Pie at Forty Eighteen

Have you made any great – or not so great – desserts lately?

by Melanie

Chicken Vegetable Soup

January 20, 2014 in Kitchen by Melanie

Happy National Soup Month!

I didn’t used to love soup. I think it had something to do with growing up in Arizona. When it’s summer 9 months out of the year, there’s just not a lot of soup weather.

Besides… Something that is served as an appetizer isn’t my idea of a filling meal. I mean, am I right or am I right?

But then I moved to Utah where it’s winter 9 months out of the year. Well, some of those months are technically spring and fall, but Mother Nature tends to show her bipolar side in Utah and those seasons end up looking a lot like winter, too.

Anyway… my point? It’s cold.

Most of the time.

And cold weather is perfect soup weather, so I have learned to love soups.

January is National Soup Month, and I have been pulling out our favorite soup recipes and trying some new ones. I have also been a bit under the weather since the day after Christmas.

Yep, it has been more than 3 weeks. Blah.

So naturally I pulled out this homemade chicken noodle soup. I LOVE it. It’s full of tasty veggies and delicious broth. I like to use a rotisserie chicken for the extra flavor (and ease), and I tend to put in *heaping* cups of veggies.

It will warm you up all the way down to your toes.

vegetable-chicken-noodle-soup


Vegetable Chicken Noodle Soup

  • 1 c chopped onions
  • 1 c chopped carrots
  • 1 c chopped celery
  • 1 garlic clove, minced
  • 2 tsp olive oil
  • 1/4 c flour
  • 1/2 tsp dried oregano
  • 1/4 tsp dried thyme
  • 1/4 tsp poultry seasoning
  • 6 c reduced-sodium chicken broth
  • 4 c cubed peeled potatoes
  • 1 tsp salt
  • 2 c cubed cooked chicken
  • 2 c uncooked yolk-free wide noodles
  • 1 c fat-free evaporated milk

Start with a big pot. Saute the onion, carrots, celery and garlic in oil for about 5 minutes or until they get tender. Stir in the flour, oregano, thyme, and poultry seasoning until blended, then saute for another minute. Add the potatoes and salt, then gradually add the broth and bring it to a boil. Reduce heat, cover, and simmer 15-20 minutes or until potatoes are tender. Stir in the chicken and noodles. Simmer for another 10 minutes or until noodles are tender. Reduce heat. Stir in the milk and heat through (do not boil). Makes about 2 quarts of delicious soup.


Are you a soup person? What is your favorite soup to eat on a cold day?

Related Posts Plugin for WordPress, Blogger...