Happy Valentine’s Day

February 14, 2014 in Master Suite

Today started like any other day. Woke up early and gathered with the family for scripture study. Breakfast. Mr. 4018 got ready for work and left with the older girls to drop them off at junior high. I went through the regular morning ritual with the littles:

Get ready for school. Clean up your breakfast dishes. Stop fighting with your sister! Get ready for school. Brush your teeth. Do you need help with your hair? Get ready for school. Grab your jacket. Are you ready to go? Get ready for school. It’s time to go. Why are you still in your pajamas? Get ready for school!

In the middle of all that fun, I heard someone walk in the front door. We have had some random guys wandering around the neighborhood lately – through closed gates into backyards and up to back doors, so at first I thought some crazy person was about to attack us. Always nice to start the morning with a good scare.

I had to figure out who was sneaking into my house. Do you know who I found? Mr. 4018!

That stinker acted like everything was normal all morning long. He even let me make him a lunch and send him off to work. He had his computer with him and was stressing about the girls getting out the door on time so he wouldn’t be late.

Then he walked back in the door and surprised me with the announcement that he had taken the day off of work and had no where else he needed to be.

Best. gift. ever.

I have NEVER seen him keep a surprise from me this well. Ever.

When we were engaged, he gave me a birthday week because he couldn’t keep a secret. hahaha He bought me a gift, couldn’t wait to give it to me and then felt bad that he didn’t have anything to give me on my birthday. So he got me another gift and couldn’t wait to give it to me. Then he felt bad that he didn’t have anything to give me on my birthday. That happened a few more times. Maybe that’s why he’s more of a last minute gift guy now.

So thanks to my husband’s fabulous surprise, we had the greatest Valentine’s Day in recent memory. We didn’t do anything earth shattering, but we got to spend the entire day together. It’s days like this that remind me why I love this man.

How did you celebrate?

happy-v-day


My First Blog Conference – Lessons Learned

February 11, 2014 in Office

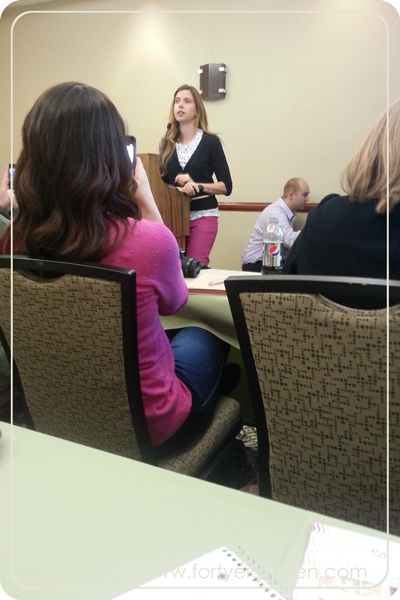
I am seriously considering a career change. I want to live the life of a blog conference junkie. Is that a thing? Build Your Blog Conference 2014 was so much fun! I just want to travel the world attending conferences and meeting amazing bloggers from everywhere!

I would also love a chance to relive some of my favorite moments and try to do a few things better. Because I want my next conference to be even BETTER, I made a list of some lessons I learned at my first blog conference.

13 ways to ROCK your first blog conference from fortyeighteen.com


#1: Dress for comfort. I’m not talking sweats or yoga pants, although if that’s what you want to wear – go for it! You can dress up or go casual, but either way make sure you are comfortable in what you’re wearing. You don’t want to be adjusting and stressing about your outfit all day. And for the love of all chocolate, wear comfortable shoes.

13 ways to ROCK your first blog conference from fortyeighteen.com

#2: Don’t be shy! One of the main reasons you attend a conference is to network. This is not the time to be a wall flower. Say hello, reach out, ask questions and really get to know people. The friends you make will be your blogger network and your support group. And you never know when you will make a lifelong friend.

#3: You don’t need a bajillion media kits or a thousand business cards. Definitely bring business cards and media kits, but don’t overdo it. Even if 1,000 bloggers will be attending your conference, you won’t be able to meet all of them. There’s only so much time in a day, after all.

#4: Write notes on the business cards you collect. Include reminders of how and when you met or something to help you remember the blogger later. You will leave with MANY cards, and you will want reminders to help you follow up later.

13 ways to ROCK your first blog conference from fortyeighteen.com

#5: Stay on the property! Even if you’re local, take advantage of any hotel discounts being offered and stay in the middle of the action. Totally worth every penny! No worries about weather, driving conditions, driving time, or trying to leave the kids again in the morning. Not to mention the convenience of walking downstairs to the workshops and extra time you get to play with your roommates and new friends! You can ask for roommates if you want to split the cost (or just have more fun). If the rooms are all full, you shouldn’t have any problem finding someone willing to take you on as a roommate.

13 ways to ROCK your first blog conference from fortyeighteen.com

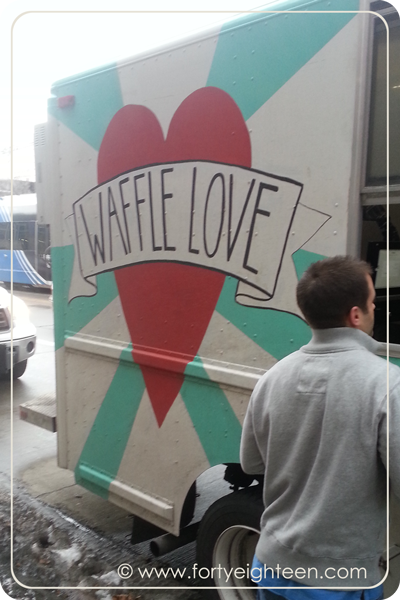
#6: Take advantage of local discounts, offers, and any extras offered through your conference. We got to enjoy fabulous waffles for breakfast, fresh from the Waffle Love truck that parked right outside the hotel just for us. We had special shopping discounts at the local mall. A group of us were able to have a free dinner at an amazing restaurant provided by one of the sponsors. Indulge and enjoy any extras that are part of your conference.

#7: Unless you’re going to a hands-on photography workshop, don’t bother with the big fancy camera. Between the swag bag (or two), snacks, notes, business cards, media kits, and everything else, you already have enough to carry around. You know you will be attached to your phone, (aren’t we all?) so be best friends with your phone’s camera. Speaking of cameras…

#8: Take a million pictures. I know, I know. What kind of a blogger has to be told to take photos of everything? Apparently me. I was shocked to get home and discover I hardly had any pictures! That is definitely one thing I would change if I could do it over.

#9: Choose the right bag. I brought a backpack. I regretted it the ENTIRE weekend. Too bulky, too awkward, and too inconvenient. Make a better choice than I did. Next time I think a cross body messenger bag will be perfect for me.

13 ways to ROCK your first blog conference from fortyeighteen.com

#10: You don’t need to pack so many snacks. Seriously. This one is for me. After the ah.maz.ing dinner (it was so dark in the restaurant that I couldn’t get a good photo on my camera, but trust me, it was way more amazing than it looks), fabulous breakfast, big lunch, snacks in the swag bag, and treats offered by just about every sponsor, I didn’t even touch my snacks until the very last afternoon when I had a few almonds and a bit of chocolate. I basically added extra weight to my load for nothing. I’m sure I will still pack a few snacks next time, but I will keep it small.

#11: Set goals. What do you want to get out of the conference? Why are you here? Make some goals and then focus on them throughout the conference.

13 ways to ROCK your first blog conference from fortyeighteen.com

#12: You will be overwhelmed. You will. It’s ok. In fact, it’s totally normal. You just learned a TON of stuff in just a little time! Don’t stress about it. Just choose one new thing and implement it. Then add another when you’re ready. Don’t try to do it ALL at once. Just choose something and do it.

#13: Relax and have fun! No need to stress or worry. You will have a great experience, so be sure to enjoy it while it happens because it will be over before you know it!

Have you been to a blog conference? What did you learn? What advice would you give to a first-timer?

Homemade Wheat Bread

February 4, 2014 in Kitchen

I used to laugh when my dad would smell something and tell us about the memory it triggered. Whose memory is in their nose??? My dad’s.

And apparently mine is, too.

I vividly remember walking home from school and walking in the door to the most heavenly smell. I was lucky to have a mom who was home when I got home from school, and on the best days, I got to come home to warm bread fresh from the oven.

Amazing Supermom Wheat Bread | Forty Eighteen #wheat #bread

Yum.

Nothing says home quite like the smell of homemade bread.

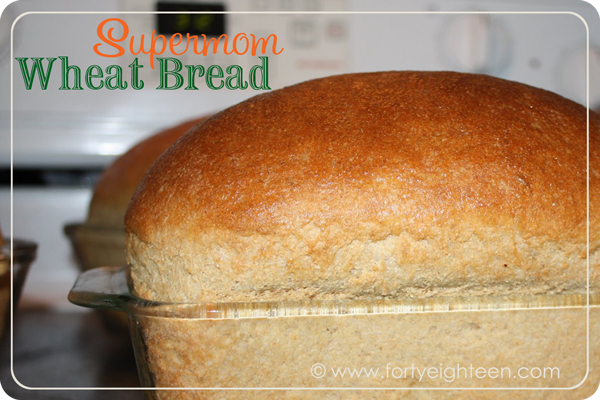
The thing about homemade whole wheat bread is that it’s often really dense and heavy. And it seems to dry out really fast. If that is how you feel about wheat bread, you are going to LOVE this.

Amazing Supermom Wheat Bread | Forty Eighteen #wheat #bread

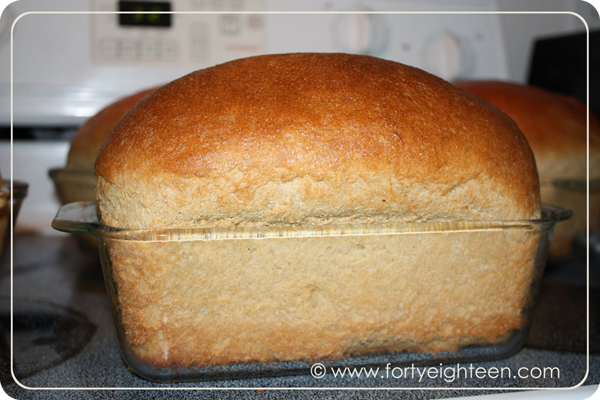
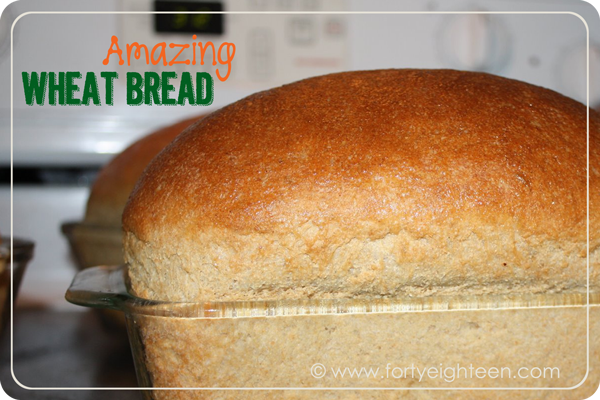
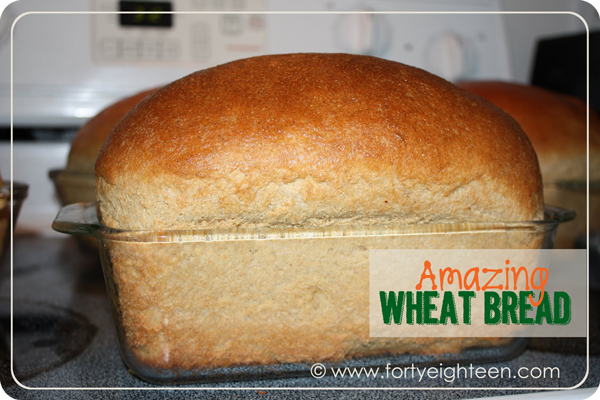
This bread is the absolute best. It’s light and fluffy and so, so tasty! Add some homemade jam, and it’s good enough to be dessert.

Trust me.

Do you know what else I love about homemade bread? It totally makes me feel like Supermom every time I make it.

Feel like supermom when you make this amazing bread! | Forty Eighteen

It’s not like bread is hard to make, but still… it’s pretty super.

Try it. You’ll see what I mean.

Amazing Supermom Wheat Bread | Forty Eighteen #wheat #bread


Supermom Wheat Bread

  • 5 c hot water (115-120 degrees F)
  • 2 Tb SAF yeast (3 Tb if you use another kind of yeast)
  • 1/2 c honey
  • 1 Tb liquid lecithin
  • 1/3 c oil
  • 2 Tb salt
  • 1 tsp vitamin C powder
  • 12 c whole wheat flour (or a bit more as needed)

In your bread mixer, mix together everything except the flour. You don’t need to proof the yeast. Just toss it in there. Measure out the oil first, then pour that into the 1/2 c before pouring it into the mixer. That way your honey won’t stick to the cup. The lecithin is super sticky, so you’ll probably have to measure it the first time, but then just eyeball it after that. I have to get the lecithin and vitamin C powder at a health food store. The vitamin C powder really makes it fluffy, so don’t leave that out.

Then add the flour and mix 10 minutes on medium speed. Don’t add more flour after the first 2 minutes (it has something to do with how the gluten breaks down). The mixer kneads it for you so you don’t have to!

Now it’s time to raise the roof! I mean, the dough.

One of the things that makes this bread so light and fluffy is the double rise. First, let the dough rise until doubled. I put it in one of those big red plastic bowls you can get at Walmart for about $2 and let it raise until it just starts peeking over the top of the bowl.

Then smash it down (this is a great stress reliever) and divide it into 4-5 equal parts. Shape into loaves and let rise In the well-greased loaf pans until it’s an inch or two above the edge.

Bake at 350 for 40 minutes. When you pull it out, brush the tops with butter, if desired. This is purely for that pretty shine. You can let it sit for a few minutes before taking it out of the loaf pans, but don’t let it sit too long or it will sweat and get soggy.

Then sit back, have a slice, and enjoy feeling like Supermom.

supermombread


Family Valentine’s Party

February 1, 2014 in Great Room

I love Valentine’s Day.

Love. It.

Sure, you have to pay 4 times as much as usual for flowers and chocolate. Okay, greeting cards are expensive and cheesy. Maybe the pressure can get a little high to plan the perfect romantic evening. And then there’s the whole “It doesn’t mean as much if you’re doing it just because of a date on the calendar” argument.

Whatever.

Haters gonna hate, but I think any day devoted to expressing your love to the people closest to you is a good thing.

Who says you need ridiculously expensive flowers and chocolate and high-pressure dates to have a great day???

My favorite Val’s day tradition is our family party. It started when the younger kids wanted to exchange valentines like their big sisters did at school. So we set up bags next to the dinner plates and everyone passed out their little valentines.

We loved it so much that now we do it every year… except the year Chuck was in the hospital with RSV and pneumonia on Valentine’s Day. Ah, family life. Never a dull moment.

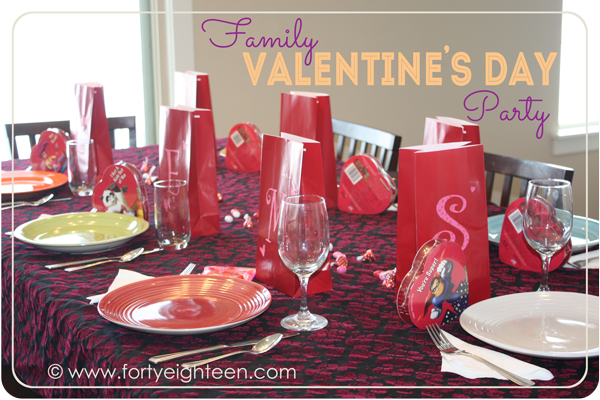
Family Valentine's Day celebration


It always starts with a fun dinner. One year we did a big breakfast for dinner complete with biscuits and gravy, hash browns, fresh fruit with homemade whipped cream, eggs, juice…. it was divine. Whatever we eat, it’s always something everyone loves.

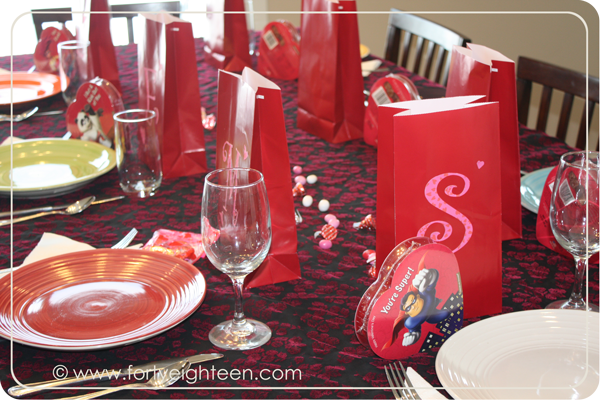
We decorate the table and make sure there’s a spot for everyone’s valentines. I love the monogram bags we made last year. The bags were Christmas clearance items I bought for pennies. I cut the letters and hearts out of cute scrapbook paper with my silhouette and just glued them on. Easy, cheap, and cute – my favorite kind of craft!

I bought those cute little boxes of chocolates that you can find for a dollar or two, and set one at each place. For a “centerpiece” we sprinkled candy down the center of the table. Appetizer, decoration, and dessert in one!

Family Valentine's Day celebration

We read our valentines, eat yummy food and treats, play fun games, and have a fabulous night together celebrating how much we love each other.

Of course, I love to celebrate with my sweetheart, just the two of us – and we will – but who doesn’t love an excuse to celebrate just being a family?

How do you celebrate Valentine’s Day???

Chocolate!

January 29, 2014 in Great Room, Kitchen

I’ve had to make a few desserts lately, so I went searching for a fabulous pie for a pie social and a chocolate cake for National Chocolate Cake Day (January 27). We could call this Pinspiration: The Chocolate Dessert Edition.

pinspiration-red

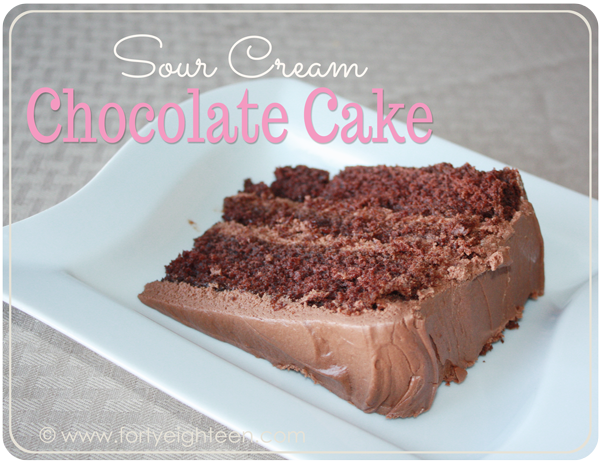
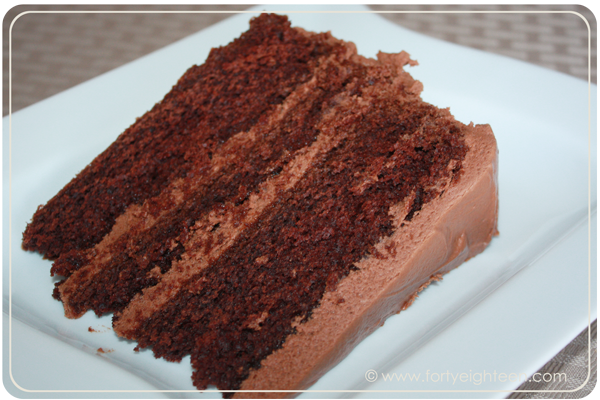
We couldn’t let National Chocolate Cake Day pass without an appropriate celebration, so I went searching for a chocolate cake recipe fit for a party. We have a favorite chocolate sheet cake recipe that is fast and easy and loved by everyone (even Beth, who doesn’t like cake), but I wanted something different. I found this chocolate layer cake at Taste of Home and fell in love. My family ALWAYS requests the sheet cake for every event that requires cake, so I never get to do fancy cakes with big layers and lots of frosting anymore. This was a definite MUST pin and MUST try.

Chocolate desserts including this Sour Cream Chocolate Cake at Forty Eighteen


The cake was fabulous. Moist and delicious, dense enough to stack well, but not heavy or dry. One of the cakes stuck to the cooling rack and ripped apart when I tried to pick it up a little less carefully than I should. You can see that my middle layer is WAY smaller than the other two. hahaha The vultures descended and inhaled the unusable part until the counter was cleaner than when I started cooking. That little taste made us even more excited for dessert time.

I should probably make a little note here about my love of frosting. I LOVE frosting. I kept a can of frosting in my dorm room fridge just to sneak a spoonful when I needed a sugar high to make it through a late-night cram session. Oh, who am I kidding. I ate it with my bare hands whenever I wanted just because I could.

This chocolate frosting somehow managed to be unbelievably sour and sickeningly sweet at the same time. I made the colossal mistake of assuming it would work with the cake and proceeded to completely ruin this fabulous cake with this horrible frosting. So sad.

So I would definitely recommend the cake and I plan to make it again, but I will be searching for a much better chocolate frosting recipe that will complement this delicious cake. Click on an image to take you to the pin.

Chocolate desserts including this Sour Cream Chocolate Cake at Forty Eighteen

Sour Cream Chocolate Cake

  • 1 c baking cocoa
  • 1 c boiling water
  • 1 c butter, softened
  • 2-1/2 c sugar
  • 4 eggs
  • 2 tsp vanilla extract
  • 3 cups cake flour
  • 2 tsp baking soda
  • 1/2 tsp baking powder
  • 1/2 tsp salt
  • 1 c ( 8 oz) sour cream

Dissolve the cocoa powder in the boiling water and set aside to cool. Cream the butter and sugar until light and fluffy, then add eggs, one at a time, beating well after each one. Add the vanilla. Combine the flour, baking soda, baking powder, and salt and gradually add to the creamed mixture, alternating with the sour cream. Beat well with each addition. Finally, add the cocoa mixture and mix well.

Pour batter into 3 greased and floured 9-inch round cake pans. Bake at 350 for 30-35 minutes (don’t overcook or it will dry out) or until a toothpick inserted in center comes out clean. Cool for 10 minutes in pans before removing to cooling racks. Cool completely before frosting.

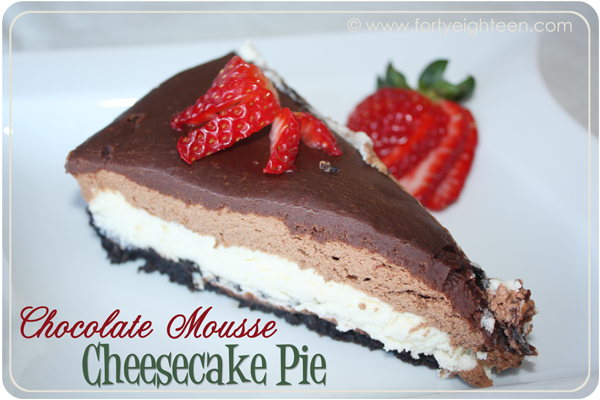
For the pie social, I knew everyone would be bringing a pie so there would be lots of flavors to try. I decided early on that I wanted to make something chocolatey and then headed to Pinterest to investigate. This Chocolate Mousse Cheesecake Pie from Mel’s Kitchen Cafe was the winner… and I chose wisely.

Chocolate desserts including this Chocolate Mousse Cheesecake Pie at Forty Eighteen


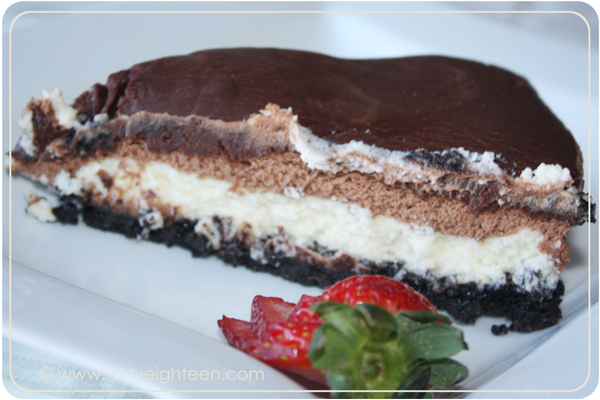
Full disclosure: This pie is not a quick fix. It takes a lot of time to put it together, but it is totally worth the effort. You start with an Oreo crust and add creamy cheesecake. Spread on a layer of fluffy chocolate mousse and top with rich, decadent ganache.

oh. my. yumminess.

Seriously. This pie is a. ma. zing.

It’s incredibly rich, so you only need a small piece. Make it even more amazing by slicing up a strawberry and having a bit of strawberry with each bite.

Pure heaven.

Honestly, I’m not a huge Oreo fan, so I would make a different crust next time. Maybe Pecan Sandies or something with nuts, butter, and flour. Either way, I WILL DEFINITELY be making this again.

Chocolate Mousse Cheesecake Pie

Crust:

  • 24 Oreos, crushed
  • 5 Tb melted butter

Cheesecake:

  • 8 oz cream cheese, softened
  • 1/2 c sugar
  • 1 large egg
  • 1 egg yolk
  • 1 tsp vanilla
  • 1 c sour cream

Mousse:

  • 1 c heavy cream, divided
  • 2 egg yolks
  • 1/2 c semisweet chocolate chips
  • 1/4 c powdered sugar (optional for sweetness)

Ganache:

  • 1/2 c semisweet chocolate chips
  • 4 Tb butter
  • 1/4 c heavy cream
  • 1/2 tsp vanilla
  • 1 Tb powdered sugar

Preheat the oven to 325. To make the crust, combine the crushed cookies and melted butter. Press on the bottom and up the sides of a deep 9-inch pie plate or a springform pan. Refrigerate while you make the cheesecake filling.

Cream the cream cheese and sugar until smooth. Add the egg, yolk, and vanilla and mix until combined. Blend in the sour cream. Spread the filling over the cookie crust and bake for 40-45 minutes, until the edges are set and the center is slightly firm. Mel says a little softness is okay, but you don’t want it to be really jiggly. Let it cool completely before adding the mousse.

To make the mousse, bring 1/2 c cream to a simmer in a small saucepan. With your egg yolks in a small bowl, pour a couple tablespoons of the hot cream into the egg yolks and whisk vigorously until completely combined. Return the egg mixture to the saucepan with the cream. Keep whisking quickly and stir constantly until it bubbles and thickens, about 1-2 minutes. Remove from the heat and stir into the chocolate chips, whisking until the mixture is smooth and the chocolate is completely melted. Now is the time to add the powdered sugar if you would like a little more sweetness: whisk in up to 1/4 cup. Let the mixture cool to room temperature, mixing occasionally to avoid a skin forming across the top. Beat the rest of the cream (1/2 c) to stiff peaks, and gently fold into the chocolate mixture when it has completely cooled. Spread it over the top of the cheesecake layer and chill.

While it chills, make the ganache by heating the cream and butter over medium heat in a saucepan until simmering. Place the chocolate chips in a small bowl and pour the hot cream mixture over. Stir until the chocolate is melted, glossy and smooth. Stir in the vanilla and powdered sugar. Spread over the mousse and refrigerate until ready to serve (at least an hour up to a day in advance).

 Chocolate desserts including this Chocolate Mousse Cheesecake Pie at Forty Eighteen

Have you made any great – or not so great – desserts lately?

Related Posts Plugin for WordPress, Blogger...